
Deployment
Describes how to move your solution from your local development environment, to a production-like environment in the cloud, or on-premises.
When developing an Optimizely Content Management System (CMS) site with Visual Studio integrations, the site will use IIS Express, SQL Server Express, and LocalDB to make it easy for developers to build and test sites.
Deployment scenarios
During development, you will eventually want to deploy your solution to a production-like environment to verify that everything works. You normally plan how to deploy, maintain, and host the website. Cloud-based options are great for optimizing resource usage. Specific development considerations may apply depending on the site's choice of hosting and maintenance. See Plan deployments.
Some common deployment scenarios include:
- Cloud-based – Deploy to Azure Web Apps.
- Cloud-based managed service – Deploy to Optimizely Customer-Centric Digital Experience (DXP).
- Containerized hosting – Deploy to, for example, Kubernetes.
- Non-cloud – Deploy to Microsoft IIS and Windows Server.
Deploy to Azure Web Apps
In this scenario, you deploy your site to an environment based on Microsoft Azure cloud components. Before deploying your site, you must create and configure the various Azure components needed, including a Web App, an SQL Database, a Service Bus, and a BLOB storage.
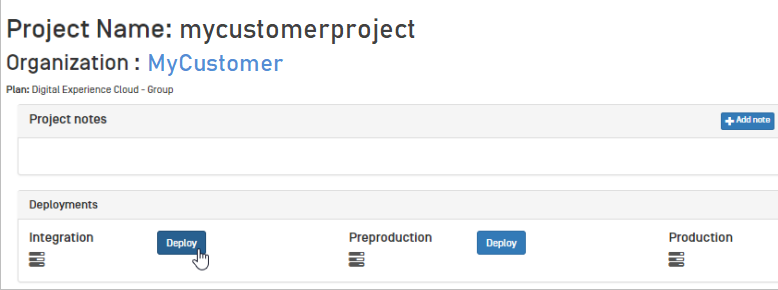
Deploy to DXP
Cloud-based solutions are powerful when scaling for site availability. However, managing the required components can be quite challenging. With Optimizely Digital Experience Platform (DXP), you let CMS manage the cloud components for you. You can deploy yourself through the CMS self-deployment portal or let CMS do the deployment.
Deploy to Microsoft Windows Server
You can also run your site "non-cloud" using Microsoft IIS and Windows or SQL Server. As a first step when moving towards a production-like environment, you can set up a local environment with IIS and deploy it to understand how it works. Moving to a full version of IIS also requires enabling some features.
When deploying, you create the artifacts for the site, the database, and the application data and then use XCOPY to move the files to the target server. See Deploy to Windows servers.
Create an empty database
Included in a CMS installation is a cmdlet called Initialize-EPiDatabase. You can use this if you are testing the CMS and want to create a fresh database for your site. The cmdlet installs database schemas included in the installed NuGet packages (CMS and Commerce). Run the command in the Package Manager Console in Visual Studio, and it creates a database in your App_Data folder.
Note
When you create a new database, your old data is overwritten. If you want to keep your data, you can use CMS's export/import feature. This lets you define which items you want to export to an XML file. Data from the XML can then be imported to your new database.
You can also create a database directly on a remote server:
-
Create an empty database on the SQL Server.
-
Configure your connection string in your
web.configto point to your empty database. -
Run the following command in the Package Manager Console:
Initialize-EPiDatabase -sqlFilePattern:c:\\data\\mysql.sql -connectionString:MyConnectionString
Updated 3 days ago